
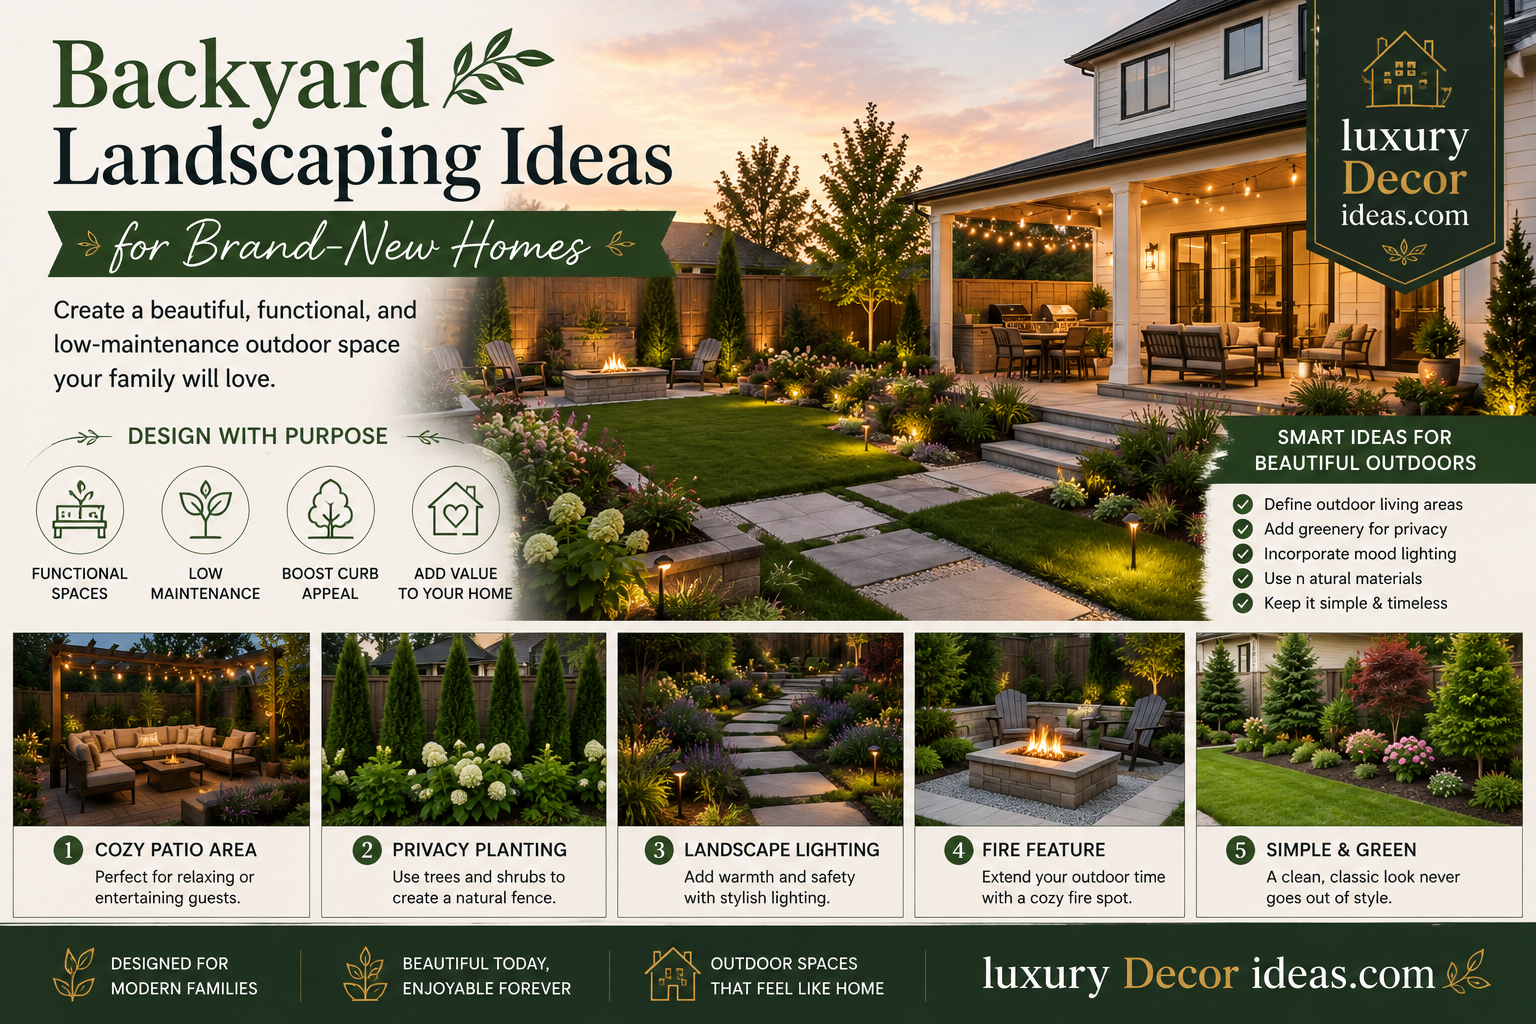
Introduction
You finally got the keys. The moving boxes are (mostly) unpacked, and now you’re standing at the back door staring at a rectangle of compacted dirt, construction debris, and maybe a lonely patch of weeds where a lawn is supposed to be. Welcome to the part of homeownership nobody warns you about: the blank backyard.
New construction homes almost never come with real landscaping. Builders grade the lot, maybe toss down some straw or a thin layer of sod, and call it done. Everything else — the trees, the patio, the privacy fence, the garden beds — is on you.
That’s actually good news. A blank yard means no bad decisions to undo, no overgrown shrubs from a previous owner, and total control over how the space works for your life. But it also means you’re making a lot of choices at once, usually with a tighter budget than you’d like right after closing costs.
This guide walks through everything: what to do first (hint: it’s not planting), how to sequence projects so you’re not redoing work, real cost ranges, plant and hardscape ideas that fit different budgets and climates, and the mistakes that trip up almost every new homeowner. Grab a coffee — this is the only backyard planning article you’ll need. ☕
Table of Contents
- Before You Plant Anything: The New-Build Reality Check
- Step 1 — Assess Your Lot (Grading, Soil, Drainage)
- Step 2 — Set a Realistic Budget and Phasing Plan
- Step 3 — Design the Layout (Zones That Actually Work)
- Lawn Basics: Sod vs. Seed vs. Alternatives
- Hardscaping Ideas: Patios, Paths, and Structures
- Planting Ideas by Budget and Climate
- Privacy Solutions for New Neighborhoods
- Backyard Lighting and Irrigation
- DIY vs. Hiring a Landscaper: Comparison Table
- Estimated Costs Breakdown
- Backyard Landscaping Checklist
- Common Mistakes to Avoid
- Expert Tips From the Field
- Frequently Asked Questions
- Conclusion
1. Before You Plant Anything: The New-Build Reality Check
Here’s the thing most people don’t realize: new construction dirt is not garden soil. Heavy equipment compacts it during building, topsoil often gets scraped away and never replaced properly, and what’s left behind is frequently a mix of subsoil, construction fill, and the occasional buried scrap of drywall or lumber.
Before you buy a single plant, walk your property and check for:
- Standing water after rain (drainage problem)
- Grade that slopes toward your foundation instead of away from it
- Buried construction debris (dig a few test holes)
- Irrigation lines, utility markers, or sprinkler stubs the builder left
- Property line stakes so you know exactly what you own
This is unglamorous work, but it saves you from expensive redos later. I’ve seen homeowners install a $4,000 patio only to find out the grading pushed water straight into their crawl space the following spring.
📸 Image alt text suggestion: “New construction backyard with bare dirt and drainage grading before landscaping begins”
2. Step 1 — Assess Your Lot (Grading, Soil, Drainage)
Grading Comes First
The ground should slope away from your house at roughly a 2% grade — about a 2-inch drop for every 10 feet — for at least the first 10 feet around your foundation. If water pools near your house after a heavy rain, fix grading before you do anything else.
Test Your Soil
A basic soil test tells you pH, drainage rate, and compaction level. You can:
- Buy a $15–$25 DIY soil test kit
- Send a sample to your local university extension office (often $10–$30 and far more accurate)
Drainage Red Flags
- Water sitting for more than 24 hours after rain
- Soggy patches even in dry weather
- Erosion channels forming in the dirt
If you spot these, you may need a French drain, a dry creek bed, or a simple swale before construction of any hardscape begins.
3. Step 2 — Set a Realistic Budget and Phasing Plan
Full backyard landscaping for a new build typically runs $15,000–$50,000+ if done all at once professionally. Almost nobody does it all at once, and you shouldn’t either.
Instead, phase it over 1–3 years:
Phase 1 (Move-in year): Grading fixes, basic lawn (sod or seed), essential drainage, a simple patio pad or gravel seating area.
Phase 2 (Year two): Fencing, foundation planting, trees (they take years to mature, so get them in early), irrigation.
Phase 3 (Year three+): Patios/decks, outdoor kitchen, lighting, garden beds, water features.
💡 The biggest budget mistake new homeowners make is spending everything on hardscaping in year one and having nothing left for the plants and trees that actually make a yard feel finished.
4. Step 3 — Design the Layout (Zones That Actually Work)
Think of your backyard in functional zones rather than one big open space:
- Lawn zone — for kids, pets, or open play
- Dining/entertaining zone — patio, table, grill
- Lounge zone — seating, fire pit, hammock
- Garden zone — vegetable beds, flower borders
- Utility zone — trash bins, AC unit, storage shed, compost
Sketch this out on graph paper or a free tool like SketchUp Free or Canva before committing to anything permanent. Even a rough hand-drawn sketch prevents the classic mistake of putting a patio where the shed obviously should go.
H3: Consider Sun and Shade Patterns
Track how sun moves across your yard for a full day (or a few days across seasons if you can wait). This determines where a patio stays comfortable in summer, where a vegetable garden will actually produce, and where shade trees are worth the investment.
5. Lawn Basics: Sod vs. Seed vs. Alternatives
| Option | Cost (per 1,000 sq ft) | Time to Usable Lawn | Pros | Cons |
|---|---|---|---|---|
| Sod | $500–$900 | Immediate–2 weeks | Instant results, less erosion risk | Expensive, needs heavy watering to establish |
| Seed | $100–$300 | 6–10 weeks | Cheaper, more grass variety options | Slower, vulnerable to birds/weather/erosion |
| Hydroseed | $200–$450 | 3–6 weeks | Good middle ground, even coverage | Needs consistent watering, less control over spots |
| Artificial turf | $1,200–$2,500 | Immediate | Zero mowing, drought-proof | High upfront cost, can get hot, less eco-friendly |
| Clover/eco-lawn mix | $150–$350 | 6–8 weeks | Low maintenance, pollinator-friendly | Less traditional look, some HOAs restrict it |
Our take: If your budget allows it, sod is worth it for new builds because it stabilizes bare soil immediately and prevents the erosion that untreated dirt lots are prone to. If budget is tight, seed a small area now and expand later rather than doing nothing.
6. Hardscaping Ideas: Patios, Paths, and Structures
Patio Materials Compared
| Material | Cost per sq ft (installed) | Durability | DIY-Friendly? |
|---|---|---|---|
| Poured concrete | $6–$12 | High | Moderate |
| Pavers | $10–$25 | Very high | Yes (with effort) |
| Gravel/decomposed granite | $3–$6 | Moderate | Yes |
| Natural stone/flagstone | $15–$30 | Very high | Moderate |
| Wood deck | $15–$35 | Moderate (needs upkeep) | Moderate |
| Composite deck | $25–$45 | High | Moderate |
Ideas Worth Considering
- Gravel patio with a fire pit — cheapest way to create an instant gathering space, often under $800 DIY
- Paver walkway connecting side gate to backyard — solves the “mud path” problem almost every new yard has
- Pergola over a small patio — adds shade and structure without full roof cost
- Raised garden beds along the fence line — productive and visually softens a blank fence
- Dry creek bed — doubles as drainage solution and design feature
7. Planting Ideas by Budget and Climate
Budget Tiers
Under $500: A few 3-gallon shrubs, perennial starts, mulch, and a small tree (1–1.5 inch caliper) from a local nursery. Buy small — trees and shrubs often catch up to larger, pricier specimens within a few seasons.
$500–$2,000: Foundation planting around the house, a small tree grove, defined garden beds with edging, decorative grasses for texture.
$2,000+: Mature trees (2.5+ inch caliper), professional bed design, irrigation-integrated planting, specimen plants.
Climate-Smart Picks
Always check your USDA hardiness zone before buying anything. A few reliable categories:
- Shade trees: red maple, live oak, honey locust (fast-growing, good for new yards needing shade quickly)
- Privacy shrubs: arborvitae, boxwood, viburnum
- Low-water perennials: black-eyed Susan, coneflower, lavender, yarrow
- Native ground covers: creeping thyme, native sedges — cut down on mowing and water use
🌱 Native plants deserve extra attention here. They’re adapted to your regional rainfall and soil, need less babying, and support local pollinators. Your county extension office or a local native plant society can point you to species specific to your area.
8. Privacy Solutions for New Neighborhoods
New subdivisions are notorious for tight lot lines and clear sightlines into every neighbor’s yard. A few options, roughly cheapest to most expensive:
- Tall ornamental grasses ($15–$40/plant) — fast privacy screen, softer look than a fence
- Bamboo or trellis with vines ($200–$600 for a section) — quick vertical coverage
- Wood privacy fence ($20–$45 per linear foot installed)
- Vinyl privacy fence ($25–$50 per linear foot installed)
- Row of evergreen trees (arborvitae) ($40–$150/tree depending on size) — permanent, natural-looking screen
⚠️ Check your HOA rules and local setback ordinances before installing any fence or tall hedge row. This trips up more new homeowners than almost anything else on this list.
9. Backyard Lighting and Irrigation
Lighting
- Solar path lights: $10–$25 each, no wiring needed, good starter option
- Low-voltage LED landscape lighting: $200–$800 DIY kit, more control and brightness
- Professionally installed lighting system: $1,500–$4,000+, includes transformer, timers, uplighting for trees
Irrigation
- Manual hose/sprinkler: free–$100, labor-intensive
- Basic drip irrigation for beds: $150–$400 DIY
- Full in-ground sprinkler system: $2,500–$5,000 for an average lot, professionally installed
If you’re phasing your landscaping, it’s smart to install irrigation lines before you finish hardscaping — trenching through a finished patio is a headache you don’t want.
10. DIY vs. Hiring a Landscaper: Comparison Table
| Factor | DIY | Hiring a Professional |
|---|---|---|
| Cost | Lower (labor-free) | Higher (labor + design fees) |
| Time | Weekends/months, depends on your schedule | Days to a few weeks |
| Design expertise | Learn as you go | Professional grading, drainage, and design knowledge |
| Warranty/guarantees | None | Often 1–2 year plant/workmanship warranty |
| Best for | Planting, mulching, simple patios, small fences | Grading, drainage, large hardscape, retaining walls |
Pros of DIY: Full creative control, lower cost, satisfaction of doing it yourself. Cons of DIY: Steep learning curve for grading/drainage, mistakes can be expensive to fix, time-intensive.
Pros of hiring: Faster results, professional grading and drainage handled correctly, design cohesion. Cons of hiring: Higher cost, less flexibility, scheduling delays common with new-build neighborhoods (everyone’s landscaping at once).
A hybrid approach works well for most people: hire out grading, drainage, and any structural hardscape (retaining walls, large patios), then DIY the planting, mulching, and lighting.
11. Estimated Costs Breakdown
| Project | Estimated Cost Range |
|---|---|
| Grading correction | $500–$3,000 |
| Basic lawn (sod, 1,000 sq ft) | $500–$900 |
| Small patio (200 sq ft, pavers) | $2,000–$5,000 |
| Privacy fence (150 linear ft) | $3,000–$7,500 |
| Foundation planting (basic) | $500–$1,500 |
| Shade tree (2 planted) | $300–$1,000 |
| Irrigation system | $2,500–$5,000 |
| Landscape lighting (DIY kit) | $200–$800 |
| Full basic backyard (Phase 1–2 combined) | $10,000–$20,000 |
| Full upgraded backyard (all phases) | $25,000–$50,000+ |
These are general national averages — get 2–3 local quotes since costs vary significantly by region and labor market.
12. Backyard Landscaping Checklist ✅
- [ ] Confirm property lines and utility markers
- [ ] Check and correct grading away from foundation
- [ ] Test soil (pH, drainage, compaction)
- [ ] Review HOA rules for fencing, plant height, lawn type
- [ ] Sketch a zoned layout (lawn, dining, lounge, garden, utility)
- [ ] Set a phased budget across 1–3 years
- [ ] Install irrigation lines before hardscape
- [ ] Choose lawn method (sod, seed, alternative)
- [ ] Plant trees early — they need the most time to mature
- [ ] Add privacy screening where sightlines are an issue
- [ ] Build patio/seating area
- [ ] Add mulch to all garden beds (weed control + moisture retention)
- [ ] Install basic lighting for safety and ambiance
- [ ] Set a watering schedule for the first growing season
13. Common Mistakes to Avoid ⚠️
1. Planting before fixing drainage. Beautiful beds mean nothing if water pools around your foundation.
2. Buying full-size trees to “skip the wait.” Smaller, younger trees establish faster and often outgrow expensive larger specimens within a few years.
3. Ignoring HOA rules until after installation. Fences and certain plants get flagged and forced removal, which costs you twice.
4. Doing everything in year one. Overspending on hardscaping leaves nothing for the plants that actually soften and finish a new yard.
5. Skipping a soil test. New-build soil is often compacted fill, not the topsoil you’d expect — amending it properly saves years of struggling plants.
6. Forgetting utility lines before digging. Always call 811 (in the US) before any digging project, even for small planting holes near the house.
7. Overcrowding new plant beds. Plants look sparse at first — resist the urge to plant too densely; most need 2–3 years to fill in.
8. No plan for irrigation before hardscaping is finished. Trenching through a new patio for sprinkler lines is expensive and avoidable.
14. Expert Tips From the Field 🛠️
- Get your grading inspected before your builder’s warranty period ends. Most builders offer a 1-year warranty that covers grading issues — use it if water is pooling near your foundation.
- Start a compost pile in year one. New-build soil benefits enormously from added organic matter, and free compost from kitchen scraps is one of the best amendments you can add.
- Mulch everything, even bare beds you haven’t planted yet. It suppresses weeds and protects soil structure while you plan.
- Talk to neighbors who moved in around the same time. In new developments, several households often face identical drainage or soil issues — pooling knowledge (and sometimes splitting bulk material delivery costs) saves real money.
- Don’t be afraid to leave sections unplanted for a season. A phased, well-thought-out yard beats a rushed one that needs redoing in two years.
- Order mulch, gravel, and soil in bulk from a landscape supply yard rather than bags — it’s dramatically cheaper for larger projects, often half the per-unit cost of bagged materials.
15. Frequently Asked Questions
1. How much does it cost to landscape a backyard for a new home? Most new homeowners spend $10,000–$20,000 on a basic Phase 1–2 backyard (lawn, basic planting, small patio, fencing), with full upgraded yards running $25,000–$50,000+ over several years.
2. What should I do first when landscaping a new construction backyard? Start with grading and drainage assessment, then soil testing. Planting or hardscaping before these are corrected often leads to costly redos.
3. Is sod or seed better for a new home lawn? Sod establishes faster and controls erosion better on bare new-build dirt, but costs more. Seed is cheaper and offers more grass variety but takes 6–10 weeks to become usable and is more vulnerable to weather.
4. How long does it take to fully landscape a new backyard? Most homeowners phase projects over 1–3 years rather than completing everything at once, both for budget reasons and because trees and plants need time to mature regardless of budget.
5. Do I need a landscaper for a new construction yard, or can I DIY it? A hybrid approach works well: hire professionals for grading, drainage, and major hardscape, and DIY planting, mulching, and lighting.
6. What plants are best for new-build compacted soil? Tough, adaptable natives and perennials like coneflower, black-eyed Susan, and ornamental grasses tolerate compacted or amended soil better than delicate specimens while the soil structure improves.
7. How do I add privacy in a new neighborhood with no mature trees? Fast options include tall ornamental grasses, a trellis with fast-growing vines, or a privacy fence. Evergreen tree rows take longer but give a permanent natural screen.
8. What’s the biggest mistake new homeowners make with backyard landscaping? Spending the full budget on hardscaping in year one and running out of money for the trees, shrubs, and irrigation that make a yard feel complete.
9. Should I install irrigation before or after building a patio? Before. Running irrigation lines after hardscape is finished means trenching through your new patio or paying extra for tunneling.
10. How do I know if my new yard has a drainage problem? Watch for standing water 24+ hours after rain, soggy patches during dry weather, or erosion channels forming in bare soil. Any of these signal you should address drainage before further landscaping.
16. Conclusion
A brand-new backyard is a blank slate, and that’s genuinely exciting — but it rewards patience over impulse. Fix the ground first, plan your zones, phase your spending, and plant your trees early since they need the most time. Everything else — patios, lighting, garden beds — can follow at a pace your budget and schedule actually allow.
The yards that feel effortlessly finished a few years down the road almost always started with someone doing the unglamorous work first: checking the grade, testing the soil, and resisting the urge to do it all in one overwhelming (and expensive) weekend. Give your yard that same foundation, and the fun part — actually enjoying it — comes a lot sooner. 🌳🌻